Description:
Remote control a board via its USB Serial Cable.
(i.e. board does not require any WIFI / Ethernet network ability)
Login to your session at: https://desk.iotleaf.co.uk
Features:
Turn led On/OFF.
Adjust PWM power output.
View analogue and digital inputs.
View temperature sensor reading (MCP9700).
1) May require enabling a chrome browser flag..
chrome://flags/#enable-experimental-web-platform-features
2) linux users do this and reboot machine..
sudo adduser <yourname> dialout
Requirements:
1) Local Computer Setup
Computer <---> USB Cable <---> Demo Board


2) Remote Control Setup
PC or Android Phone with Chrome Browser.

Instructions
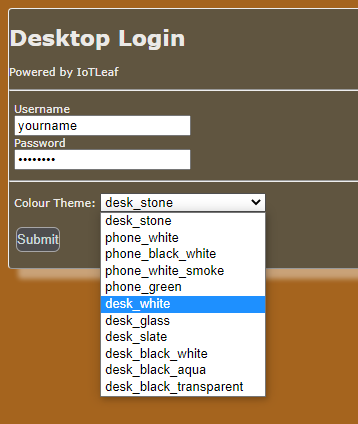
1) Login desk_white theme
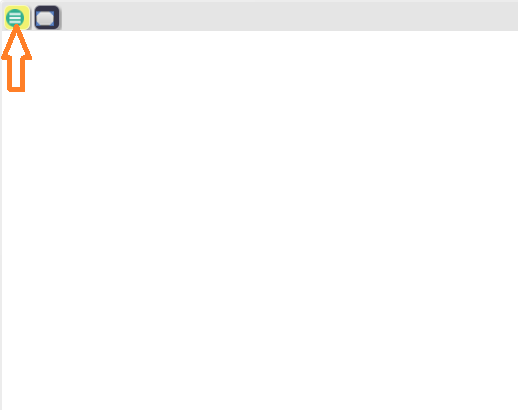
2) After login should see Green menu button and maximise desktop buttons.

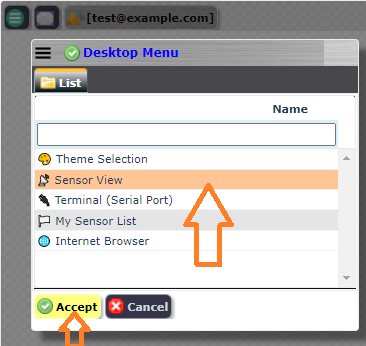
3) Click the desktop menu button
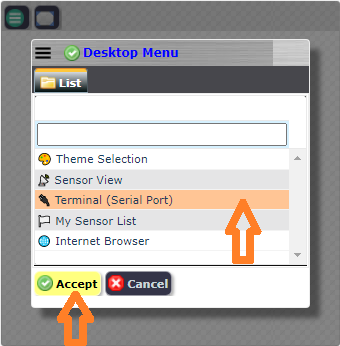
4) Select Terminal (Serial Port), then click Accept button
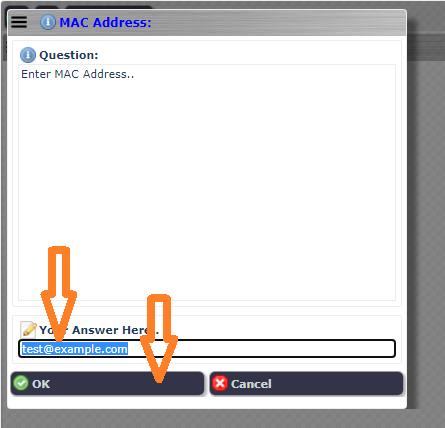
5) Enter your mac address (you will re-enter this for step 19 later so remember it..)
6) Click Port Select
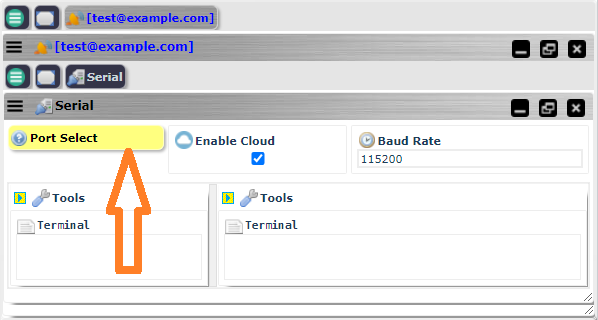
7) Select your port number (e.g. COM4)
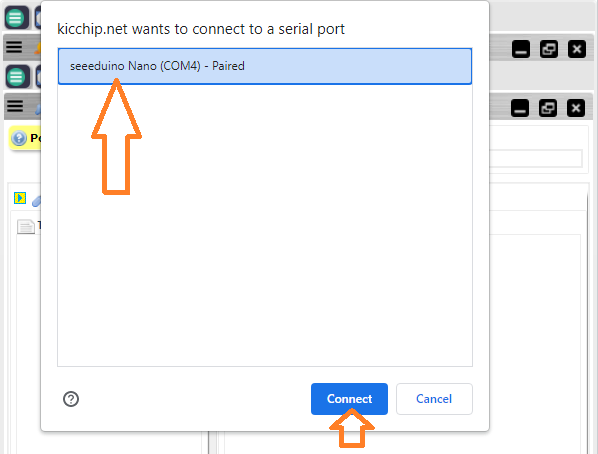
8) Click Port Open button

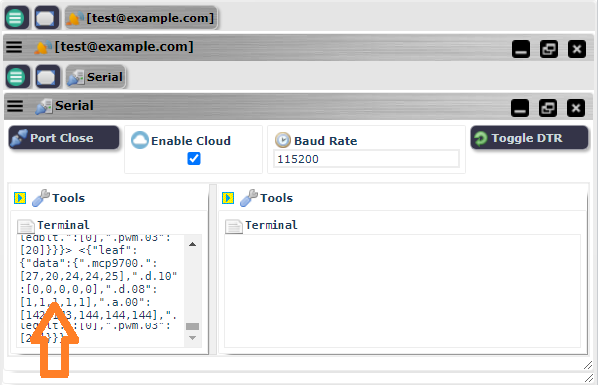
9) .. You should see data in left side terminal window
10 Click the sensors menu button (is second green menu button down )
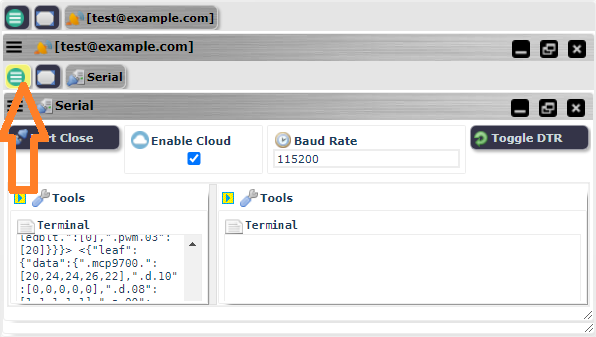
11) Select Training Demo then click Accept button
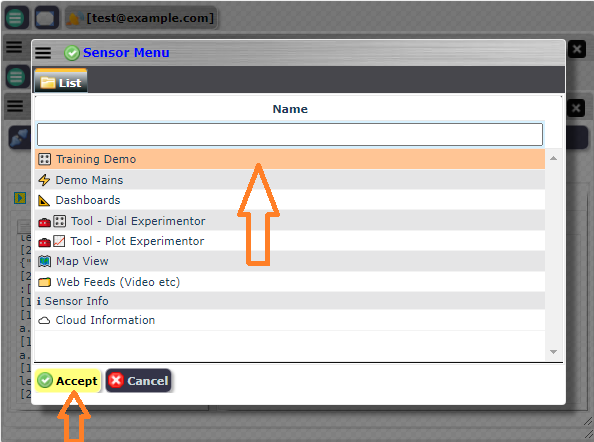
12) .. You should see buttons dials

13) Select the button labeled ".ledblt." by clicking the text. The background will change colour. You now have control.

14) Scroll your mouse up or press arrow up on keyboard. The led on your board will go on.
15) Select ".pwm.03" by clicking the text.
The background will change colour. You now have control.

16) Scroll mouse up down or press arrow key up down on keyboard. The pin (03) will output various levels of PWM.
17) From your PC, or from a remote PC Click the Desktop Menu button

18) Select Sensor View then click Accept button
19) Re-enter whatever mac address you used before (i.e. in step 5 above)
Note: If you don't have your own device to connect to , you can use demo data from iotleaf.
Just enter a mac address of 2 to 1000.

20) You should see and be able to interact with remote device (same as in steps 13/14/15 )
Simple arduino code to send constant values
#define my_data "<{\"leaf\":{\"data\":{ \"_ledblt_\":[1],\"_pwm_03\":[100],\"_mcp9700_\":[21,25,27,25,21],\"_a_00\":[700,700,600,600,700],\"_a_01\":[500,500,400,400,500],\"_d_10\":[0,0,1,1,1],\"_d_08\":[1,0,1,0,1]}}}>"

void setup()
{
  // open serial at 115200 baud
  Serial.begin(115200);
}
void loop()
{    // wait 1 second
  delay(1000) ;
  // send data
  Serial.println( my_data ) ;
}
Libraries needed
1) Download these libraries..
https://iotleaf.co.uk/download/libraries/kicchip.zip
https://iotleaf.co.uk/download/libraries/kic_serial_scan.zip
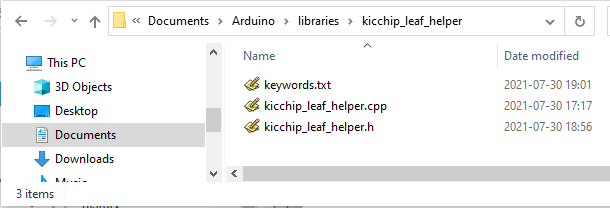
https://iotleaf.co.uk/download/libraries/kicchip_leaf_helper.zip
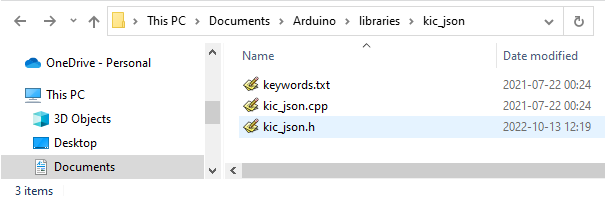
https://iotleaf.co.uk/download/libraries/kic_json.zip
2) Import into Arduino IDE.
Online help: https://docs.arduino.cc/software/ide-v1/tutorials/installing-libraries
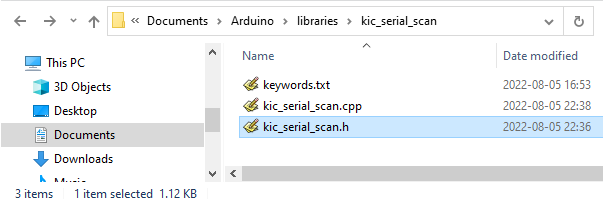
Screenshot

Directory structure should look like this..


Download demo program folder and unzip into Documents/arduino/..
https://iotleaf.co.uk/download/training1f.zip

/*
 version 1f
 changing from dots to underlines in fieldnames
  '.d.08' ---> '_d_08'
*/
// *********************************************************
// No need to change this part!
// scroll down to 'Your own code' section..
// *********************************************************
#include "kicchip.h"
#include "include_me.h"
// *********************************************************

// *********************************************************
// Your own code from here down..
// *********************************************************

// ----------------------------------
// Pin connections
// ----------------------------------
// built in led
// xaio c++ version too old in C++98
//'my_kicchip_serial_scan' must be initialized by constructor, not by '{...}'
/*
  pin connections
  ===
  13  ->> led (due)
  12  ->> led (nano)
  10  ->> btn_a
   9  ->> btn_gnd
   8  ->> btn_b
   6  ->> led (mkr1000)
   5  ->> pwm_ground
   3  ->> pwm_supply
   2  ->> led xaio (probably).
  A5  ->> input by mcp9700
  A1  ->> input by user
  A0  ->> input by user
 */
constexpr as int k_pin_in_10         {10} ;
constexpr as int k_pin_ground        { 9} ;
constexpr as int k_pin_in_08         { 8} ;
constexpr as int k_pin_ground_pwm    { 5} ;
constexpr as int k_pin_supply_pwm    { 3} ;
constexpr as int k_pin_mcp700_input  {A5} ;
// ----------------------------------

// ----------------------------------
// Labels used in iotleaf stream
// ----------------------------------
constexpr dim as t_const_label k_label_in_08         { "_d_08"      } ;
constexpr dim as t_const_label k_label_in_10         { "_d_10"      } ;
constexpr dim as t_const_label k_label_adc_0         { "_a_00"      } ;
constexpr dim as t_const_label k_label_adc_1         { "_a_01"      } ;
constexpr dim as t_const_label k_label_led_built_in  { "_ledblt_"   } ;
constexpr dim as t_const_label k_label_pwm_demo      { "_pwm_03"    } ;
constexpr dim as t_const_label k_label_mcp9700       { "_mcp9700_"  } ;
// ----------------------------------

// ----------------------------------
// storage values used when user interacts via internet
// ----------------------------------
dim as byte                    my_val_led_built_in   {       0 } ; //led on off
dim as word16                  my_pwm_demo           {      20 } ; //pwm output
// ----------------------------------

// ===============================================
// setup routine
// ===============================================
subroutine setup ( )
begin_block

  // ----------------------------------
  // serial setup
  // ----------------------------------
  Serial.begin(115200);
  while ( !kic_serial_cable ){} // wait for serial port to be ready
  kic_serial_cable.println(""); // get past garbage in serial monitor
  kic_serial_cable.println("******* BOOT ***********") ;
  // ----------------------------------

  // ----------------------------------
  //digital input
  // ----------------------------------
  pinMode      (  k_pin_in_10         , INPUT_PULLUP ) ; //SWITCH A
  pinMode      (  k_pin_ground        , OUTPUT       ) ;
  digitalWrite (  k_pin_ground        , LOW          ) ;
  pinMode      (  k_pin_in_08         , INPUT_PULLUP ) ; //SWITCH B
  // ----------------------------------

  // ----------------------------------
  // pwm output
  // 2 pins are used, one for supply , the other for GND
  // ----------------------------------
  // -->supply side
  pinMode      ( k_pin_supply_pwm , OUTPUT      ) ;
  analogWrite  ( k_pin_supply_pwm , my_pwm_demo ) ; // set to initial value
  // <--gnd side
  pinMode      ( k_pin_ground_pwm , OUTPUT      ) ; // will act as a ground pin
  digitalWrite ( k_pin_ground_pwm , LOW         ) ;
  // ----------------------------------

  // ----------------------------------
  // digital output
  // ----------------------------------
  pinMode      ( LED_BUILTIN , OUTPUT ) ;
  // ----------------------------------

  // ----------------------------------
  // analogue input
  // ----------------------------------
  // internal pullup of adc pin (works for avr)
  pinMode( A0, INPUT_PULLUP ) ;
  // ----------------------------------

  // ----------------------------------
  // configure callback for serial scan
  // This initialises serial coming into the device for turning led on/off
  let my_kicchip_serial_scan.on_received_string = /* ns_actions::*/ do_json  ;
  // ----------------------------------
end_block
// ===============================================


// ===============================================
// Perform action based on data received from internet
// ===============================================
//unshared
fn as boolean do_action ( as JsonDocument refer_to  a_json_actions )
begin_block
  /*
   Example input to set pwm3 to a value of 22
   <{"val":{".pwm.03":22}}>

   Example of malformed input (e.g. missing value) to generate error message..
   <{"val":{".pwm.03": }>
   Generate this error message..
   <{"leaf":{"err_msg":"InvalidInput","chrs":"val"}}>
  */

  // -----------------------
  // verify the json content
  /*
  if ( !ns_kicchip_leaf_helper::get_json_doc_header ( a_json_actions )  )
    return false ;
  */
  // -----------------------

  // digital on /off (k_label_led_built_in) aka .ledblt.
  // check if user wanted to change k_label_led_built_in
  if ( is_action_wanted ( a_json_actions ,k_label_led_built_in ) )
  begin_block
    // get users value
    let my_val_led_built_in = get_action_value<as int>( a_json_actions ,k_label_led_built_in) ;
    // and do what they want
    if ( my_val_led_built_in > 0 ) { digitalWrite ( LED_BUILTIN , HIGH ) ; }
    else                           { digitalWrite ( LED_BUILTIN , LOW  ) ; }
  end_block

  //pwm out (k_label_pwm_demo) aka .pwm.03
  // check if user wanted to change k_label_pwm_demo
  if ( is_action_wanted ( a_json_actions ,k_label_pwm_demo) )
  begin_block
    // get users value
    let my_pwm_demo = get_action_value<as int>(a_json_actions ,k_label_pwm_demo) ;
    // and do what they want
    analogWrite( k_pin_supply_pwm, my_pwm_demo ) ;
  end_block

  return true ;
end_block
// ===============================================

// ===============================================
// ===============================================
subroutine get_readings_settings()
begin_block
  // ******************************
  // send to iotleaf
  // ******************************
  send_to_iotleaf_generic( k_label_led_built_in , my_val_led_built_in ) ;
  send_to_iotleaf_generic( k_label_pwm_demo     , my_pwm_demo         ) ;
  // ******************************
end_block
// ===============================================


// ===============================================
// ===============================================
// array index counter
//dim as byte my_counter   {0}    ;
subroutine get_readings_pins ( )
begin_block
  // get .mcp9700. value
  dim as integer16 my_celcius { } ;
  let my_celcius = mcp9700::get_value( analogRead ( k_pin_mcp700_input )  ) ;

  // ******************************
  // send to iotleaf
  // ******************************
  send_to_iotleaf_generic( k_label_mcp9700  , my_celcius                 ) ;
  send_to_iotleaf_generic( k_label_in_10    , digitalRead( k_pin_in_10)  ) ;
  send_to_iotleaf_generic( k_label_in_08    , digitalRead( k_pin_in_08)  ) ;
  send_to_iotleaf_generic( k_label_adc_0    , analogRead ( A0         )  ) ;
  send_to_iotleaf_generic( k_label_adc_1    , analogRead ( A1         )  ) ;
  // ******************************

end_block
// ===============================================


// ===============================================
// ===============================================
subroutine loop ( )
begin_block
  constexpr dim as unsigned long my_interval          {                200 } ;
  constexpr dim as byte          my_values_per_second { 1000 / my_interval } ;
  noreset   dim as unsigned long previousMillis { 0 } ;

  // get current timer counter
  dim as unsigned long currentMillis = millis ( ) ;

  // check if timer has reached the interval we wanted
  if ( currentMillis - previousMillis >= my_interval )
  begin_block

    // reset our timer counter
    let previousMillis = currentMillis ;

    // get fast changing data
    get_readings_pins ()               ;

    // check if arrays are full of data yet
    if ( my_values_per_second == ++my_counter )
    begin_block
      // arrays are full so prepare to send

      // reset array counter
      let my_counter = 0      ;
      // get latest user settings
      get_readings_settings() ;

      // send data to internet
      data_send            () ;
    end_block
  end_block

  // check for incoming requests
  my_kicchip_serial_scan.execute ( ) ;
end_block
// ===============================================